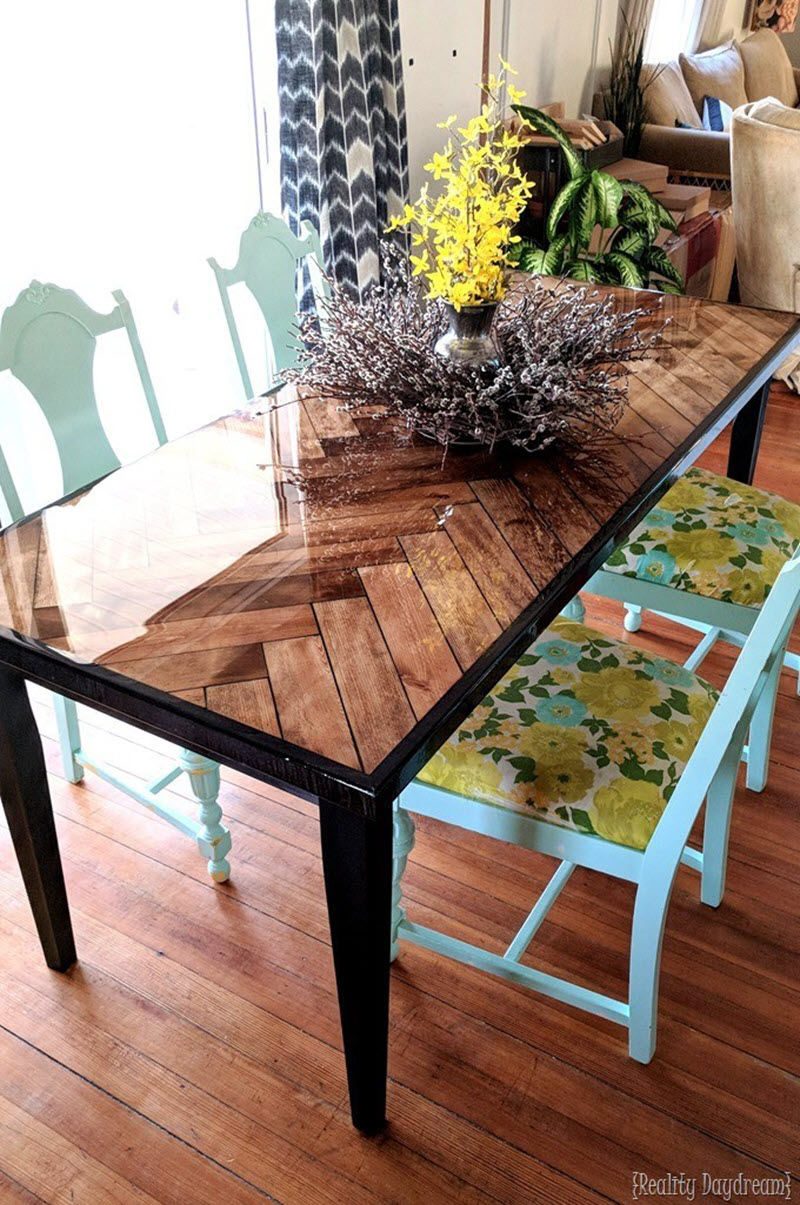
Build a Wooden Birdhouse for Your Backyard

Tuesday, November 5, 2024

0 comments
Build a Wooden Birdhouse for Your Backyard 1
Build a Wooden Birdhouse for Your Backyard 2


Materials:

Wood:
1x6 (or 1x8) pine board (for the main structure)
1/4" plywood (for the roof)
1/2" dowel rod (for the perch)
Fasteners:
1 1/4" wood screws
1" wood screws
1/2" wood screws
Other:
Wood glue
Paint or stain (optional)
Drill
Saw (circular saw or hand saw)
Measuring tape
Pencil
Hammer
Sandpaper
Level
Drill bit for dowel rod (if needed)

Instructions:

1. Cut the Pieces:

Front/Back: Cut two pieces of 1x6 wood to the desired height and width of your birdhouse (e.g., 6" high x 6" wide).
Sides: Cut two pieces of 1x6 wood to the desired height and depth of your birdhouse (e.g., 6" high x 4" deep).
Roof: Cut two pieces of 1/4" plywood to the desired width and depth of your birdhouse (e.g., 6" wide x 5" deep).
Perch: Cut a piece of 1/2" dowel rod to a length of 3-4 inches.

2. Assemble the Base:

Attach the sides to the front and back pieces: Use 1 1/4" wood screws and wood glue to attach the sides to the front and back pieces, creating a box shape. Make sure the corners are square and even.
Sand the edges: Sand down any rough edges on the assembled base.

3. Create the Roof:

Cut the roof overhang: Use a saw to cut a 1-inch overhang on the bottom edge of each plywood roof piece. This will create an overhang for better weather protection.
Attach the roof pieces: Use 1" wood screws to attach the plywood roof pieces to the top of the birdhouse. Make sure the roof overhangs the sides evenly.
Create a slight pitch: To help water drain off the roof, use a level and wood shims to create a slight pitch on the roof by adjusting the screw positions.

4. Install the Perch:

Drill a hole: Using a drill bit that is slightly smaller than the dowel rod diameter, drill a hole near the top of the front piece of your birdhouse. This hole should be slightly angled downward to help prevent water from pooling on the perch.
Insert the perch: Insert the dowel rod into the hole, securing it with wood glue or a small wood screw.

5. Finish:

Sand: Sand the entire birdhouse smooth to remove any rough edges or splinters.
Paint or stain: Paint or stain the birdhouse to your liking. Choose colors that blend into your backyard or are attractive to birds.
Weatherproofing: Apply a waterproof sealant to protect the wood from rain and humidity.

6. Placement:

Choose a suitable location: Place the birdhouse in a shady, sheltered location, preferably at least 5 feet off the ground. Avoid placing it near busy areas or predators.
Attracting birds: Consider planting native plants that provide food and shelter for birds in your backyard to encourage them to visit your birdhouse.

Additional tips:

For a more decorative birdhouse, use decorative trim or moldings to add details to the roof or edges.
You can also add a small, removable cleaning door to make it easier to clean the birdhouse.
Consider the size of the birds you want to attract when choosing the dimensions of the birdhouse.

Enjoy watching the birds build nests and raise their young in your backyard!

Read More..

Create a Wooden Toy Chest for Your Little Ones

0 comments
Create a Wooden Toy Chest for Your Little Ones 1
Create a Wooden Toy Chest for Your Little Ones 2


This guide will walk you through building a sturdy and charming toy chest for your children, providing ample storage space for their beloved playthings.

Materials:

Wood:
Plywood (1/2" or 3/4" thick) for the base, lid, and sides.
Hardwood (like oak, maple, or cherry) for the trim (optional).
Fasteners:
Wood screws (2 1/2" or 3" long).
Wood glue.
Hinges:
Heavy-duty hinges for the lid (3 or 4 per lid).
Handles:
Wooden or metal handles (2).
Finish:
Wood stain (optional).
Wood sealer (optional).
Paint (optional).
Tools:
Saw (circular saw or jigsaw).
Drill.
Screwdriver.
Measuring tape.
Pencil.
Sandpaper (different grits).
Clamps.
Safety glasses.
Dust mask.

Instructions:

1. Design and Measure:

Determine the desired size of the toy chest. Consider the space available and the amount of toys to be stored.
Draw a plan on paper, including dimensions for the base, lid, sides, and trim (if using).

2. Cut the Wood:

Using your saw, carefully cut the plywood to your planned dimensions.
If using hardwood for the trim, cut strips to the desired width and length.

3. Construct the Base:

Assemble the base by joining the plywood pieces with wood glue and screws.
Use clamps to hold the pieces together while the glue dries.
Sand the edges of the base for a smooth finish.

4. Attach the Sides:

Attach the sides to the base using wood glue and screws.
Make sure the sides are square and even before securing them.

5. Build the Lid:

Construct the lid using the same method as the base.
Attach the trim (if using) to the lid using wood glue and nails.

6. Install the Hinges:

Position the hinges on the lid and attach them to the chest with screws.
Make sure the hinges are properly aligned and allow the lid to open and close smoothly.

7. Attach the Handles:

Drill pilot holes for the handles on the lid.
Screw the handles securely in place.

8. Finish:

Sand the entire chest to remove any rough edges or imperfections.
If desired, apply wood stain to the chest. Let it dry completely before applying a wood sealer.
If you prefer paint, choose a child-friendly and durable paint and apply multiple coats for a long-lasting finish.

Safety Tips:

Always wear safety glasses and a dust mask while working with power tools.
Use clamps to hold the wood pieces securely in place while drilling and screwing.
Double-check your measurements and ensure the chest is stable before attaching the hinges and handles.
Always supervise young children when they are around the toy chest.

Customization:

Add a fun design to the lid using paint, stencils, or wood carving.
Create a personalized touch by adding the child's name or initials to the chest.
Add a felt lining to the inside of the chest for a soft and luxurious touch.
Build a separate lid to create a secret compartment for special treasures.

With this DIY guide, you can create a personalized and functional toy chest that will bring joy to your little ones for years to come.

Read More..

Make Your Own Wooden Picture Frames: Personalized Décor

0 comments
Make Your Own Wooden Picture Frames: Personalized Décor 1
Make Your Own Wooden Picture Frames: Personalized Décor 2


Introduction:

Create unique and personalized picture frames with this easy DIY project. You can choose from various wood types, sizes, and finishes to perfectly complement your style and décor. This is a great way to showcase cherished memories, treasured photos, or artwork in a truly personal way.

Materials:

Wood (pine, oak, maple, etc.)
Wood glue
Wood screws
Wood stain (optional)
Wood finish (polyurethane, wax, etc.)
Picture frame molding or trim (optional)
Glass for picture frame (optional)
Backing board (cardboard, foam board, etc.)
Measuring tape
Pencil
Saw
Drill
Sandpaper
Clamps
Paintbrush or cloth

Instructions:

1. Design and Measure:

Choose your wood: Consider the size, thickness, and type of wood based on your picture size and desired look.
Decide on the frame style: Simple square or rectangle, intricate designs, or a combination of wood and molding.
Measure your picture: Determine the dimensions of the image you want to frame.
Calculate the frame size: Add an extra 1-2 inches to each side of the picture dimensions to create a frame border.

2. Cut and Assemble:

Cut the wood pieces: Use a saw to cut the wood planks to the desired dimensions for the frame. Ensure all sides are cut accurately for a neat frame.
Join the pieces: Apply wood glue to the edges that will be joined. Use clamps to hold the pieces together until the glue dries.
Secure with screws: For added strength and stability, screw the frame corners together.
Attach molding or trim: If desired, add decorative molding to the frame edge. Glue and clamp the molding in place.

3. Finish and Decorate:

Sand the frame: Use sandpaper to smooth out any rough edges and create a smooth surface for finishing.
Stain the wood: (optional) Apply a wood stain to achieve a desired color and enhance the wood's natural grain.
Finish the frame: Apply a protective layer of polyurethane, wax, or other desired finish to seal the wood and enhance its durability.
Add embellishments: Consider adding decorative elements like paint, stencils, decoupage, or personalized engravings to enhance the frame's personality.

4. Mount the Picture:

Measure and cut the backing board: Ensure the backing board is slightly larger than the picture.
Attach the backing board: Secure the backing board to the frame with glue or screws.
Cut the glass: (optional) If using glass, cut it to fit snugly inside the frame.
Place the picture: Center and position the picture on the backing board.
Secure the glass: (optional) Use picture frame clips to secure the glass over the picture and backing board.

5. Display:

Hang your frame: Use a hanging mechanism (wire, D-rings, or sawtooth hanger) attached to the back of the frame.
Personalize and enjoy: Display your frame in a prominent spot and admire your beautiful creation!

Tips:

Experiment with different wood types and stains: Create various looks and explore the natural beauty of each wood.
Use scrap wood: Save money by using leftover wood from other projects.
Add a personal touch: Incorporate unique elements like your initials, a meaningful date, or a special quote.
Protect your frame: Avoid exposing the frame to direct sunlight or moisture to preserve its finish.

Creative Ideas:

Shadow box frames: Create depth by using a deeper frame and adding layers of objects or memorabilia.
Rustic frames: Use distressed wood or bark for a unique and natural look.
Upcycled frames: Transform old picture frames or furniture into new ones with a fresh coat of paint or decoupage.

Conclusion:

Making your own wooden picture frames allows you to express your personal style and create unique pieces that reflect your memories and interests. With a little creativity and effort, you can easily turn basic materials into beautiful and personalized home décor.

Read More..

DIY Wooden Pallet Coffee Table: An Affordable Project for Your Living Room

0 comments
DIY Wooden Pallet Coffee Table: An Affordable Project for Your Living Room 1
DIY Wooden Pallet Coffee Table: An Affordable Project for Your Living Room 2


Introduction:

Transforming salvaged wooden pallets into a stylish and functional coffee table is a popular DIY project, offering an affordable way to add rustic charm to your living room. This guide will walk you through the steps involved in creating your very own pallet coffee table.

Materials:

Wooden Pallets: Choose pallets in good condition, free from any damage or rot.
Sandpaper: Assorted grits for sanding and smoothing the wood (80, 120, and 220 grit recommended).
Wood Stain or Paint (Optional): To enhance the natural wood or give it a fresh look.
Wood Sealer: To protect the wood from moisture and stains.
Screws or Nails: To secure the pallet pieces together.
Wood Glue: To provide extra strength to the joints.
Measuring Tape: For accurate measurements.
Level: To ensure the table is even.
Safety Glasses: For eye protection during sanding and cutting.
Work Gloves: For hand protection.
Safety Gear: Dust mask or respirator, ear protection.

Tools:

Saw: Circular saw or jigsaw to cut the pallet wood.
Drill: To pilot holes for screws.
Screwdriver: To fasten screws.
Hammer: To secure nails.
Electric Sander: For faster and smoother sanding.
Paintbrush: For applying stain or paint.
Paint Roller: For applying sealant.

Steps:

1. Preparation:
Disassemble the Pallets: Carefully remove any nails or staples securing the pallet boards.
Select the Boards: Choose sturdy boards in good condition, discarding any damaged or warped pieces.
Clean the Boards: Remove any dirt, debris, and loose nails or staples.

2. Design and Cut:
Plan the Dimensions: Measure your desired length, width, and height for the table.
Cut the Boards: Use a saw to cut the boards to the desired length and width, ensuring all cuts are straight and accurate.

3. Assemble the Table Top:
Arrange the Boards: Layout the cut boards in the desired pattern for the table top.
Attach the Boards: Secure the boards together using screws, nails, or a combination of both. Apply wood glue to the joints for extra strength.
Sand the Top: Sand the table top with different grits of sandpaper, starting with coarser grit and finishing with finer grit, to achieve a smooth surface.

4. Construct the Legs:
Select Leg Boards: Choose sturdy pallet boards for the legs.
Cut the Legs: Cut the legs to the desired height.
Attach the Legs: Secure the legs to the table top using screws, nails, or wood glue, making sure they are positioned at the corners of the table.

5. Finish the Table:
Stain or Paint (Optional): Apply a wood stain or paint to the entire table, following the manufacturer's instructions.
Apply a Sealer: Apply a wood sealant to protect the table from moisture and stains. Let the sealant dry completely.

6. Final Touches:
Level the Table: Use a level to ensure the table is even. Adjust the legs if necessary.
Add a Shelf (Optional): Consider adding a shelf beneath the table top for extra storage.

Tips:

Choose high-quality pallets: Look for pallets made from hardwood, such as oak or pine, as they are more durable.
Inspect pallets thoroughly: Ensure there are no signs of damage, rot, or infestation before using them.
Safety first: Always wear appropriate safety gear while working with wood.
Pre-drill holes: Before securing screws, pre-drill pilot holes to prevent wood from splitting.
Use a level: Ensure the table is even throughout the construction process.
Personalize your design: Add unique touches, such as decorative hardware, stencils, or carvings.

Enjoy your new DIY wooden pallet coffee table!

This project allows you to create a stylish and functional coffee table while being environmentally conscious by repurposing materials. Remember to have fun with the process and let your creativity flow!

Read More..

Build Your Own Wooden Toolbox: Perfect for DIYers

0 comments
Build Your Own Wooden Toolbox: Perfect for DIYers 1
Build Your Own Wooden Toolbox: Perfect for DIYers 2


Introduction

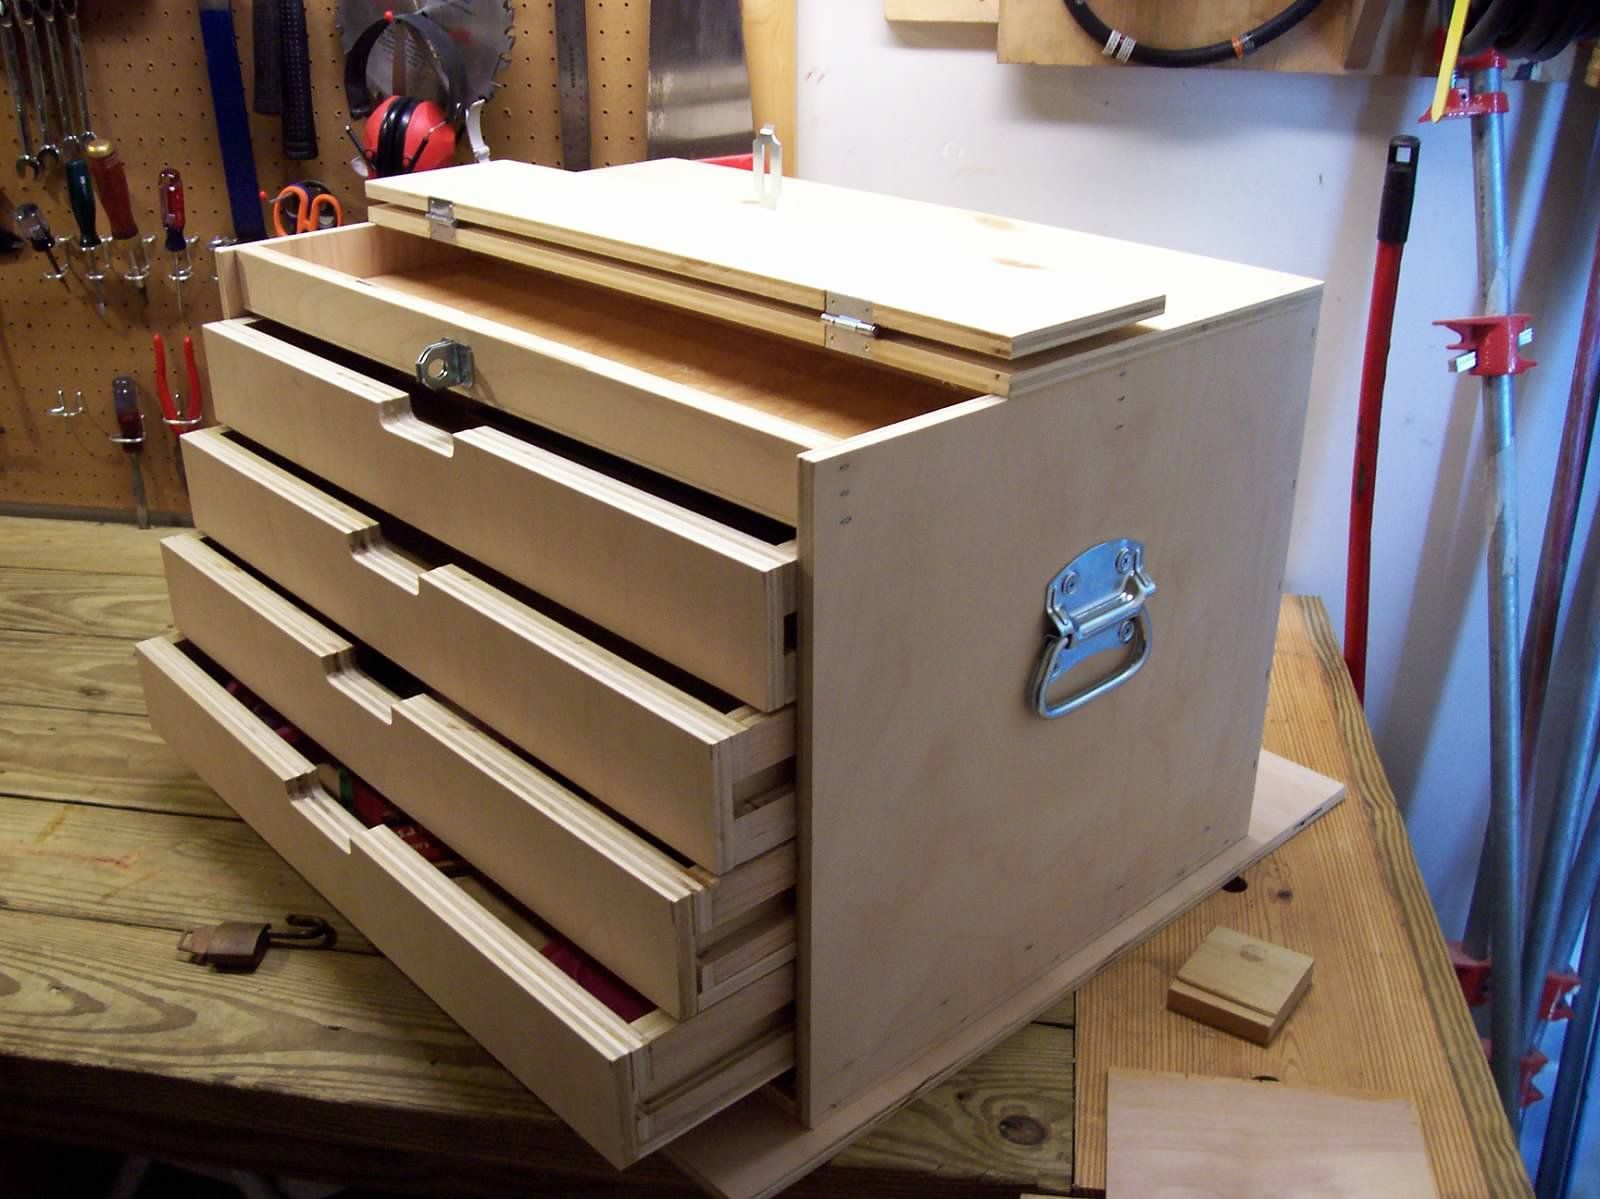
Building your own wooden toolbox is a rewarding project that allows you to create a custom storage solution for your tools. This guide will walk you through the process, from choosing materials to finishing touches.

Materials

Wood: Choose a durable and water-resistant wood like pine, cedar, or plywood.
Screws: 1.5" and 2" wood screws.
Wood glue: For added strength and stability.
Hinges: 2x 3" hinges.
Handle: A sturdy handle or a comfortable grip.
Finish: Wood stain, paint, or varnish to protect and enhance the wood.
Tools:
Saw (circular saw or hand saw)
Drill
Screwdriver
Measuring tape
Pencil
Clamps
Sander
Safety glasses and dust mask

Steps

1. Design and Cutting:
Sketch out your desired toolbox dimensions on paper, considering the tools you need to store.
Calculate the wood pieces you'll need. For example, a simple box will have two identical side panels, two identical end panels, a bottom panel, and a top panel.
Cut the wood pieces using your saw, ensuring all cuts are accurate.

2. Assembling the Box:
Lay the bottom panel flat.
Attach the side panels to the bottom panel using wood glue and screws.
Clamp the pieces together until the glue dries.
Repeat with the end panels, ensuring the corners are flush.
Attach the top panel to the box using hinges.

3. Adding a Handle:
Choose a handle that is comfortable and sturdy.
Measure and mark the placement for the handle on the top panel.
Drill pilot holes and screw the handle into place.

4. Finishing Touches:
Sand the entire box to smooth out any rough edges and prepare for finishing.
Apply your chosen finish. Stain, paint, or varnish will enhance the wood and protect it from wear and tear.
Allow the finish to dry completely before using the toolbox.

Customization

Dividers: Add dividers to create compartments for organizing specific tools.
Drawers: Incorporate drawers for smaller tools and components.
Hardware: Use metal corner brackets or metal strips for added reinforcement.
Optional features: Add a magnetic strip for holding metal tools, or a tool holder on the outside of the box.

Tips

Pre-drill holes: Drilling pilot holes before driving screws will help prevent the wood from splitting.
Sanding: Use different grit sandpaper for a smoother finish.
Cleanliness: Clean up any sawdust before applying finish.
Finishing: Apply multiple coats of finish for added protection.

Conclusion

Building your own wooden toolbox is a rewarding experience that allows you to personalize your storage solution. By following these steps and utilizing the customization options, you can create a unique and practical toolbox that will last for years to come.

Read More..

How to Make a Custom Wooden Cutting Board

0 comments
How to Make a Custom Wooden Cutting Board 1
How to Make a Custom Wooden Cutting Board 2


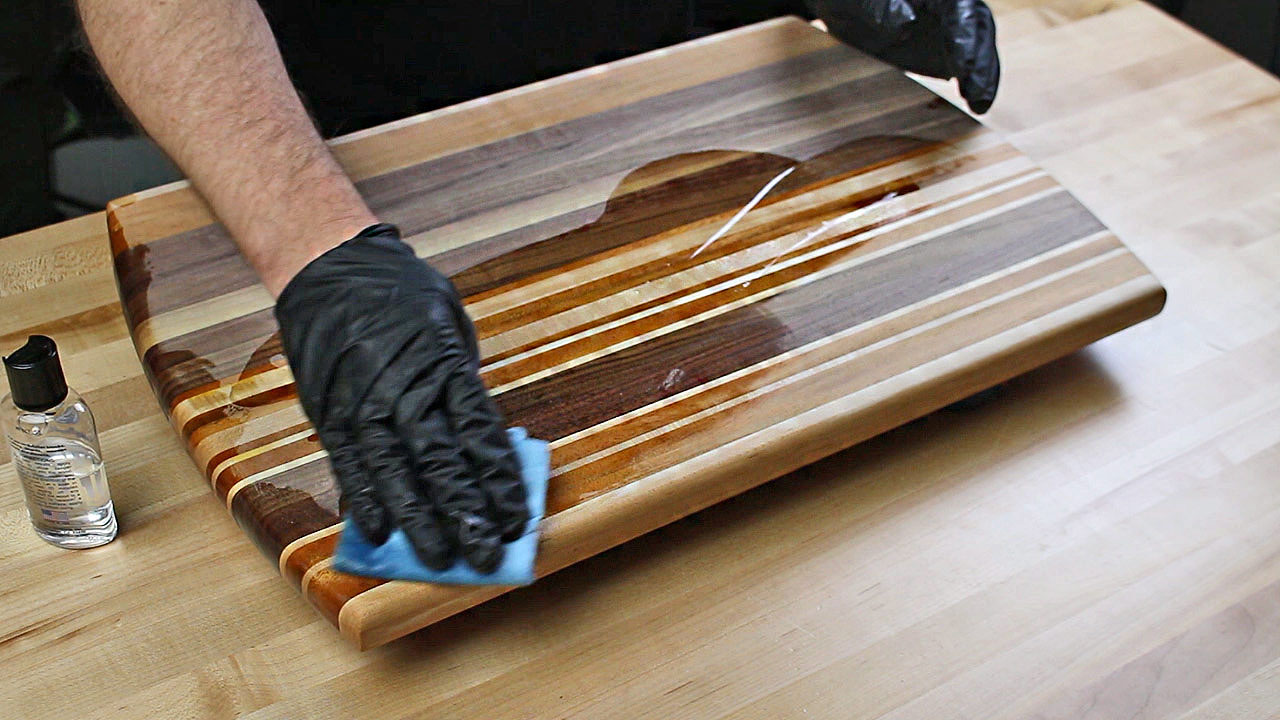
Creating a custom wooden cutting board is a rewarding project that combines woodworking skills with personal style. Here's a step-by-step guide to help you get started:

Materials:

Wood: Choose hardwood like maple, walnut, cherry, or oak for durability. You can use reclaimed wood for a unique look.
Wood glue: Use a strong, waterproof wood glue.
Finish: Mineral oil, beeswax, or food-safe polyurethane for protection and a beautiful finish.
Safety gear: Eye protection, gloves, and a respirator.
Tools:
Table saw or circular saw
Jointer
Planer (optional)
Hand plane
Sandpaper (various grits)
Router (optional)
Clamps
Drill with drill bits
Measuring tape
Pencil

Steps:

1. Choose your wood and design:

Decide on the size, shape, and style of your cutting board. Consider how you will use it and what features you want to include (e.g., handles, juice grooves).
Source your wood. You can purchase pre-cut boards or mill your own.

2. Prepare the wood:

Plane and joint: If necessary, use a jointer and planer to create flat, smooth surfaces.
Sand: Sand the wood with progressively finer grits of sandpaper to achieve a smooth finish.

3. Cut the pieces:

Shape: Cut the wood to your desired shape using a table saw or circular saw.
Handles: If you're adding handles, cut them separately and drill holes for attachment.

4. Glue the pieces together (if necessary):

Prepare the surfaces: Use a wood glue specifically designed for food-safe applications. Apply a thin, even layer of glue to both surfaces.
Clamp: Clamp the pieces together tightly and allow the glue to dry completely according to the manufacturer's instructions.

5. Shape the board:

Round the edges: Use a router or hand plane to round the edges of the board for a comfortable feel.
Add a juice groove: If desired, use a router to create a groove around the perimeter of the board to catch juices.

6. Sand the board:

Sand smooth: Sand the entire surface of the board, paying special attention to the edges and corners, to achieve a smooth, even finish.
Sand with progressively finer grits: Start with coarse sandpaper and work your way up to finer grits to remove any sanding marks.

7. Finish the board:

Apply finish: Choose a food-safe finish, such as mineral oil, beeswax, or polyurethane. Apply several coats, allowing each coat to dry completely before applying the next.
Buff: After the final coat of finish has dried, buff the board with a soft cloth to achieve a smooth, polished finish.

8. Add a personal touch:

Engrave or burn: Add a design or monogram using an engraving tool or woodburning kit.
Inlay: Create a decorative design by inlaying wood or other materials.

9. Enjoy your custom cutting board!

Safety Precautions:

Always wear safety glasses and a respirator when working with wood.
Use caution when operating power tools and follow all safety instructions.
Be mindful of dust and ensure proper ventilation.

Tips:

Consider using a template or drawing to help you accurately cut the shape of your cutting board.
Allow the wood to dry completely before applying finish.
Use a sanding block to ensure even sanding.
Test the finish on a scrap piece of wood before applying it to your finished board.

Remember, this is a general guide. There are many different techniques and approaches to making custom wooden cutting boards. Experiment with different woods, finishes, and designs to create a unique and beautiful piece that reflects your style.

Read More..

DIY Wooden Wine Rack: A Stylish Addition to Your Home

0 comments
DIY Wooden Wine Rack: A Stylish Addition to Your Home 1
DIY Wooden Wine Rack: A Stylish Addition to Your Home 2


Introduction:

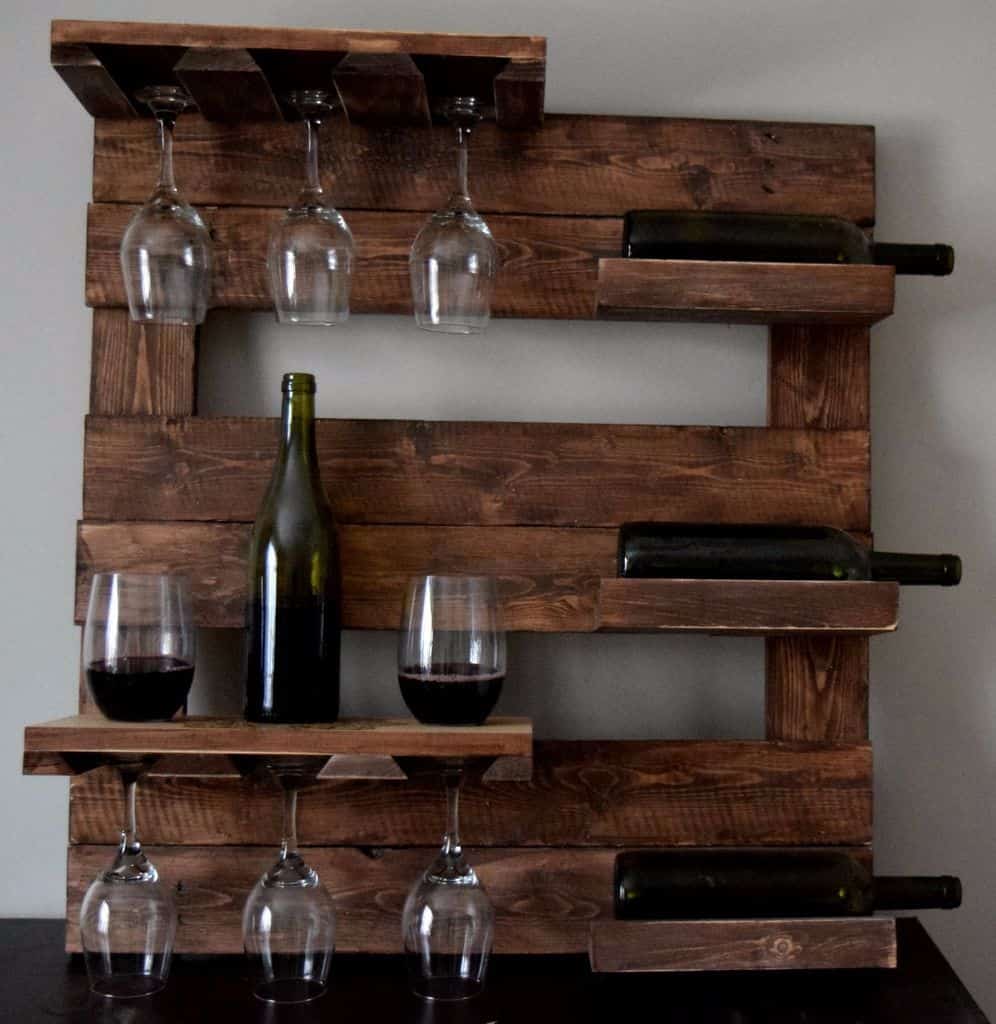
A wine rack isn't just a storage solution; it's a statement piece that adds character and charm to your home. With a little creativity and woodworking skills, you can build a custom wine rack that complements your decor and showcases your wine collection.

Materials:

Wood: Choose durable hardwood like oak, maple, or walnut. You can also use pine or plywood for a more affordable option.
Wood glue: For strong and durable joints.
Wood screws: To secure the pieces together.
Wood stain or paint: To finish the rack and add color.
Sandpaper: For smoothing the surface and creating a polished look.
Measuring tape: For precise measurements.
Saw: To cut the wood to size.
Drill: To pre-drill holes for screws.
Clamps: To hold the pieces together while the glue dries.

Design:

1. Choose a style: There are many different wine rack designs available, from simple to intricate. Consider the size of your collection and the available space.
2. Sketch your design: Draw a detailed diagram of your wine rack, including the dimensions of each piece.
3. Cut the wood: Cut the wood pieces according to your design using a saw.

Construction:

1. Assemble the frame: Join the pieces of wood together using wood glue and screws. Use clamps to hold the pieces together while the glue dries.
2. Add the shelves: Cut the shelves to size and attach them to the frame using glue and screws.
3. Sand the surface: Smooth out any rough edges with sandpaper.
4. Finish the rack: Apply stain or paint to your desired finish. Let it dry completely before using the rack.

Tips:

Consider adding a decorative touch: Use wood carving, inlays, or paint to add a personal touch to your wine rack.
Pre-drill holes: This will prevent the wood from splitting when you screw the pieces together.
Use a good quality wood glue: This will ensure a strong and lasting bond.
Let the glue dry completely: Before using the rack, make sure the glue has had enough time to dry.

Variations:

Wall-mounted wine rack: This is a great space-saving option.
Freestanding wine rack: This provides more storage space and can be placed anywhere in your home.
Wine rack with bottle storage: This allows you to store bottles upright, while also providing space for glasses or other accessories.

Conclusion:

Creating a DIY wooden wine rack is a fun and rewarding project. With the right materials and instructions, you can build a beautiful and functional piece that adds character to your home. Enjoy the process and the satisfaction of creating a unique and personalized piece for your wine collection.

Read More..

How to Build a Rustic Wooden Bench for Your Garden

0 comments
How to Build a Rustic Wooden Bench for Your Garden 1
How to Build a Rustic Wooden Bench for Your Garden 2


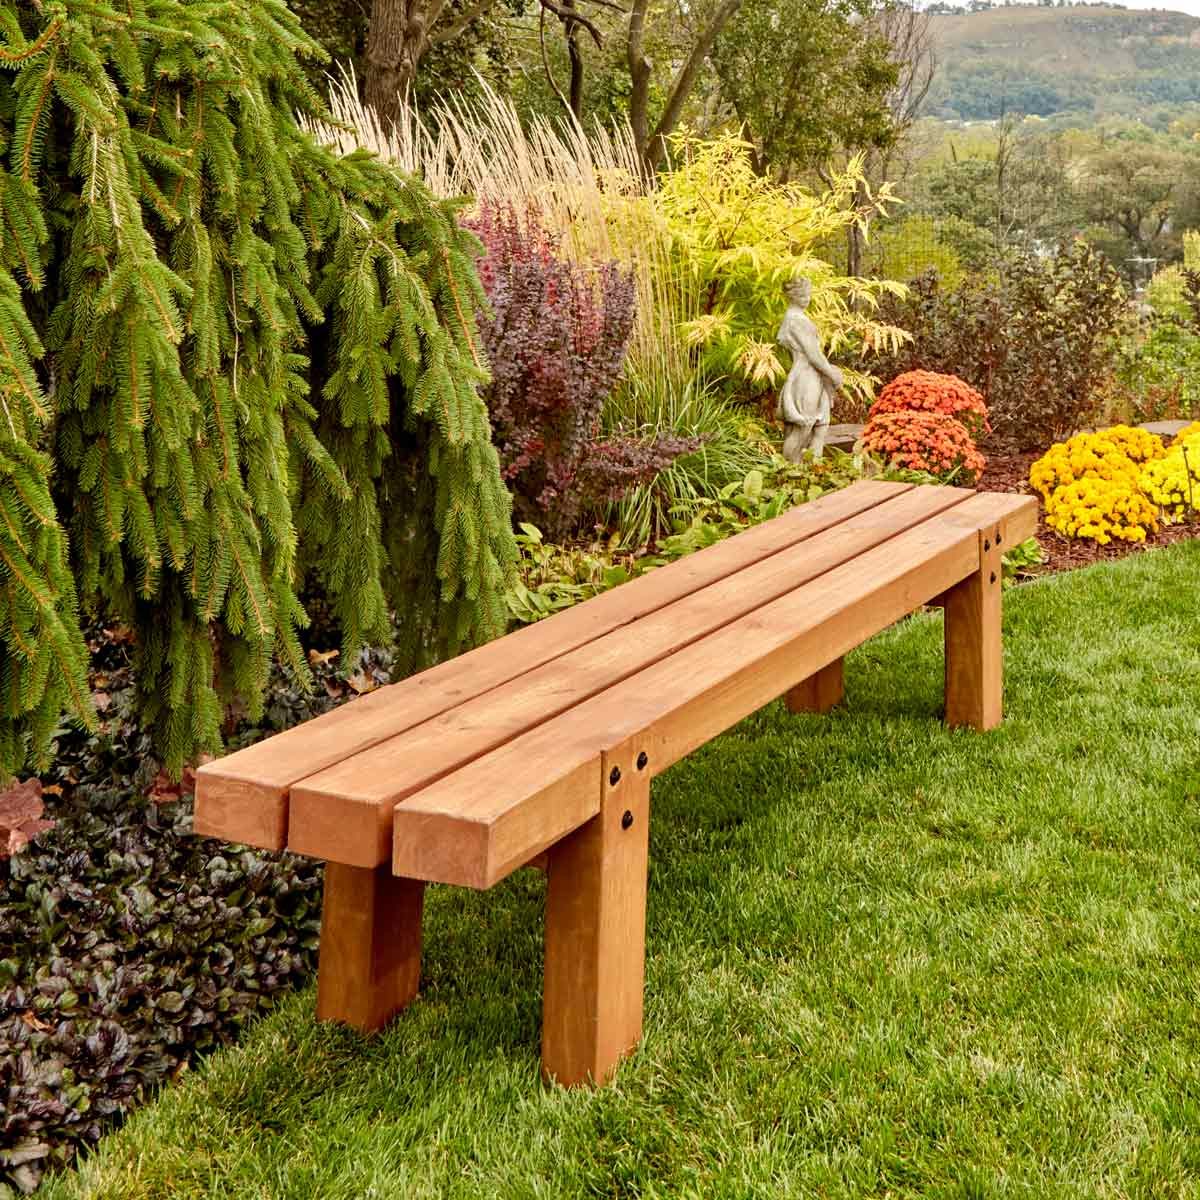
This guide will help you build a sturdy and rustic wooden bench perfect for your garden.

Materials:

Lumber:
4x4s: 2 pieces, 48 inches long for legs
2x4s: 4 pieces, 48 inches long for the seat frame
2x6s: 2 pieces, 48 inches long for the seat boards
2x4s: 2 pieces, 16 inches long for the back supports
2x6s: 4 pieces, 16 inches long for the backrest boards
Fasteners:
2.5" wood screws: Approximately 50
3.5" wood screws: Approximately 10
Wood glue:
Tools:
Circular saw or chop saw
Drill
Impact driver
Level
Tape measure
Pencil
Safety Glasses
Work gloves
Clamps

Instructions:

1. Prepare the Lumber:

Cut the 4x4s to 48 inches for the legs.
Cut the 2x4s to 48 inches for the seat frame.
Cut the 2x6s to 48 inches for the seat boards.
Cut the 2x4s to 16 inches for the back supports.
Cut the 2x6s to 16 inches for the backrest boards.
Optional: You can add a rustic look to the lumber by distressing the edges with a hammer or sander.

2. Build the Seat Frame:

Lay out: Place the 2x4s for the seat frame on a flat surface, parallel to each other and 16 inches apart.
Connect: Secure the seat frame together using wood glue and 2.5" screws. Use at least 3 screws per connection, ensuring they go into the center of the wood for stability.
Optional: You can add cross supports under the seat frame for additional strength, using 2x4s cut to the width of the bench and placed perpendicular to the frame.

3. Assemble the Legs:

Attach to frame: Attach the 4x4 legs to the underside of the seat frame using wood glue and 3.5" screws. Use 2 screws per leg.
Position: Ensure the legs are positioned at the corners of the seat frame and are level.
Optional: To add a rustic touch, use a chisel to create a slight bevel on the top of the legs.

4. Build the Backrest:

Assemble: Place the 2x4 back supports parallel to each other and 16 inches apart, approximately 12 inches above the seat frame.
Attach: Secure the back supports to the seat frame using wood glue and 2.5" screws.
Attach boards: Attach the 2x6 backrest boards to the back supports using wood glue and 2.5" screws.

5. Finish the Bench:

Sand: Sand the entire bench, starting with rough grit sandpaper to remove any rough spots and then finishing with fine grit sandpaper for a smooth finish.
Stain or paint: Apply your desired stain or paint. If using stain, apply a sealant for extra protection.

Additional Tips:

Customize: Adjust the dimensions of the bench to fit your desired size and comfort level.
Consider angles: For a more comfortable backrest, slightly angle the backrest boards.
Add armrests: For added comfort, attach armrests to the seat frame using 2x4s and 2.5" screws.
Decorate: Add decorative elements like rope or metal accents for a personalized touch.

Safety Precautions:

Wear safety glasses and work gloves.
Use a stable work surface.
Be careful when using power tools.
Always follow the manufacturer's instructions for your tools.

Enjoy your new rustic wooden bench! Remember to place it in a shaded area and treat it with wood sealant to protect it from the elements.

Read More..

Transform Your Dining Room with These DIY Woodworking Table Ideas

0 comments
Transform Your Dining Room with These DIY Woodworking Table Ideas 1
Transform Your Dining Room with These DIY Woodworking Table Ideas 2


Introduction:

Want to bring a unique, personal touch to your dining room? Look no further than a DIY woodworking table project! From rustic farmhouse tables to sleek modern designs, the possibilities are endless. This guide will inspire you with creative ideas and practical advice to build a beautiful and functional centerpiece for your dining space.

Design Inspiration:

Rustic Farmhouse: Embrace the charm of reclaimed wood and distressed finishes. Think thick, chunky legs, a live-edge tabletop, and a natural wood stain.
Modern Minimalism: Opt for clean lines, geometric shapes, and sleek materials like walnut or maple. Consider a minimalist metal base or a simple, geometric tabletop.
Industrial Chic: Combine wood with metal elements like pipes or hairpin legs. Embrace the industrial aesthetic with a distressed finish and exposed hardware.
Mid-Century Modern: Recreate the iconic look of the 1950s with tapered legs, rounded edges, and a warm wood tone.
Coastal Style: Create a breezy and inviting atmosphere with light wood tones, beachy accents like rope detailing, and a distressed white finish.

Essential Woodworking Skills:

Measuring and Cutting: Accuracy is key for a sturdy and well-proportioned table.
Joining Techniques: Learn to use dowels, mortise and tenon joints, or pocket holes for secure and durable connections.
Sanding and Finishing: Smooth out rough edges and achieve a desired finish using sandpaper and wood stains or paints.
Safety Practices: Always prioritize safety with proper tools, protective gear, and a clean workspace.

Table Ideas:

Extendable Dining Table: Create a table that can grow with your family using a butterfly leaf or sliding mechanism.
Farmhouse-Style Table: Build a sturdy and charming table with a wide, thick tabletop and chunky legs.
Floating Table: Design a minimalist and modern table with a tabletop that appears to float above a slim base.
Round Table: Embrace a classic and elegant design with a circular tabletop. Consider adding a pedestal base for a sophisticated look.
Trestle Table: Opt for a rustic and sturdy design with a tabletop supported by two or more trestle legs.

Tips for Success:

Start with a Plan: Sketch out your design and create a detailed plan before starting to ensure everything fits together properly.
Choose High-Quality Materials: Opt for durable wood species and strong hardware for a long-lasting table.
Practice Patience: Woodworking can be challenging but rewarding. Take your time, focus on accuracy, and enjoy the process.
Embrace Your Style: Let your personality shine through by adding unique details, finishes, and decorative elements.

Conclusion:

A DIY woodworking table is a rewarding project that can transform your dining room into a stylish and inviting space. With a little creativity, planning, and practice, you can craft a beautiful and functional centerpiece that will be enjoyed for years to come.

Read More..

DIY Woodworking Projects That Will Make Your Home More Inviting

0 comments
DIY Woodworking Projects That Will Make Your Home More Inviting 1
DIY Woodworking Projects That Will Make Your Home More Inviting 2


1. Rustic Shelves:

Level: Beginner
Materials: Reclaimed wood planks, brackets, stain/paint
Impact: Adds instant storage and character to any room.
Tip: Use varying lengths of wood for a more natural look.

2. Wooden Wall Art:

Level: Beginner to Intermediate
Materials: Wood scraps, saw, stain/paint, mounting hardware
Impact: Adds a personalized touch and texture to your walls.
Tip: Experiment with different shapes, patterns, and wood textures.

3. Wooden Planter Boxes:

Level: Beginner
Materials: Cedar or redwood boards, screws, stain/paint
Impact: Brings greenery indoors and adds a touch of nature.
Tip: Use a variety of sizes and shapes to create a unique arrangement.

4. Wooden Storage Bins:

Level: Intermediate
Materials: Plywood, hinges, handles, stain/paint
Impact: Adds organization and style to your home.
Tip: Use different woods for different storage needs (e.g., cedar for clothing).

5. Wooden Bench:

Level: Intermediate
Materials: Sturdy lumber, screws, stain/paint, upholstery (optional)
Impact: Provides a cozy spot for seating and extra storage.
Tip: Choose a design that complements your existing furniture.

6. Wooden Coffee Table:

Level: Intermediate to Advanced
Materials: Plywood, legs, stain/paint, glass or wood top
Impact: Creates a focal point in your living room and adds a touch of craftsmanship.
Tip: Consider adding hidden storage compartments for remote controls or books.

7. Wooden Headboard:

Level: Beginner to Intermediate
Materials: Lumber, screws, stain/paint, mounting hardware
Impact: Adds warmth and visual appeal to your bedroom.
Tip: Choose a style that complements your bed frame and décor.

8. Wooden Candle Holders:

Level: Beginner
Materials: Wood scraps, drill, sandpaper, stain/paint
Impact: Adds a warm glow and inviting ambiance to your home.
Tip: Use different wood species for a unique look.

9. Wooden Picture Frames:

Level: Beginner
Materials: Wood strips, miter saw, glue, stain/paint
Impact: Creates personalized frames to showcase your favorite memories.
Tip: Use varying wood thicknesses for a more interesting look.

10. Wooden Serving Tray:

Level: Beginner
Materials: Plywood, stain/paint, handles, optional embellishments
Impact: Adds a touch of elegance to your entertaining.
Tip: Customize the tray with engravings, inlays, or painted designs.

These are just a few ideas to get you started. With a little creativity and some basic woodworking skills, you can create custom pieces that will add warmth, personality, and a touch of handmade charm to your home. Remember to prioritize safety and always consult with professional resources for detailed instructions and techniques. Happy woodworking!

Read More..

Copyright © 2014 Childrens workbench | Powered By Blogger